How to connect to a Kubernetes Pod Shell with kubectl exec
Are you managing many applications in Kubernetes and need to access their container’s shell for troubleshooting and debugging? The kubectl exec command lets you run commands and open interactive shell sessions inside running containers in your Kubernetes pods. This article will cover everything you need to know to connect to a Kubernetes pod shell and execute commands inside its running containers.
How does the kubectl exec command work?
The kubectl exec command allows you to connect to a Kubernetes container’s shell for debugging, and other things like inspecting processes, running diagnostic commands, and so on. Before using it, ensure that you have the following prerequisites and setup:
- Kubectl is installed and configured to connect to your cluster
- The kubeconfig file is properly configured to connect to your Kubernetes cluster
- The appropriate RBAC permissions, the pods/exec resources permission is required in your role or cluster role
- At least one pod is in running state.
kubectl exec basic syntax:
kubectl exec [OPTIONS] POD_NAME -- COMMAND
When running the command above, the double dash separates the kubectl option from the commands you want to run inside the container. Without the double dash (‘--’), flags intended for your container commands, like ‘-la’, would be incorrectly interpreted as kubectl options, causing the command to fail.
Remember to always specify the namespace if your pod is not in the default one, using the –namespace option (-n).
Connecting to a Pod Shell
To open an interactive shell session in a pod, use the -it flags:
kubectl exec -it my-pod - - /bin/bash
The -it flag keeps STDIN open for interactive input, while -t allocates a pseudo-TTY and provides a proper terminal interface.
Once connected to a pod, you will see a shell prompt where you can run many Linux commands.
How to connect to a specific container when the pod has more than one container
Many Kubernetes deployments use multi-container pods. So if you want to connect to a specific container, you need to use -c or - - container flag:
kubectl exec -it my-pod -c my-container - - /bin/bash.
Another important command is the one that will list all containers that are in a pod:
kubectl get pod my-pod -o jsonpath='{.spec.containers[*].name}'
So the rule here is: if you did not specify which container to connect to, kubectl connects by default to the first container defined in the pod specification.
Always specify the namespace if your pod is not in the default namespace:
kubectl exec -it my-pod -n production -- /bin/bash
Common use cases and examples:
1. Network debugging. One of the most common problem in Kubernetes are network issues. In order to diagnose connectivity, you can use exec:
# Test DNS resolution
kubectl exec my-pod -- nslookup kubernetes.default
kubectl exec my-pod -- nslookup my-service.production.svc.cluster.local

# Test HTTP connectivity
kubectl exec my-pod -- curl -v http://my-service:8080
kubectl exec my-pod -- wget --spider http://external-api.com

# Check network routes
kubectl exec my-pod -- ip route
kubectl exec my-pod -- netstat -tulpn
2. Inspecting Application State
# View configuration files
kubectl exec my-pod -- cat /etc/app/config.json

# Check mounted volumes
kubectl exec my-pod -- ls -la /mnt/data

# Verify secret mounting
kubectl exec my-pod -- cat /etc/secrets/database-password

# Examine application logs
kubectl exec my-pod -- tail -n 100 /var/log/app.log
3. Database Operations
# PostgreSQL
kubectl exec -it postgres-pod -- psql -U admin -d mydatabase

# MySQL
kubectl exec -it mysql-pod -- mysql -u root -p

# MongoDB
kubectl exec -it mongo-pod -- mongosh

# Redis
kubectl exec -it redis-pod -- redis-cli
4. Performance monitoring
# Check memory usage
kubectl exec my-pod -- free -m

# View running processes
kubectl exec my-pod -- ps aux
kubectl exec my-pod -- top -bn1

# Check disk usage
kubectl exec my-pod -- df -h
kubectl exec my-pod -- du -sh /var/log/*

# Monitor network traffic
kubectl exec my-pod -- netstat -s
Best practices for connecting to a pod
When running kubectl exec, you grant powerful access to your containers, which raises security concerns. To avoid any security breach, you should be careful about the following things:
- RBAC Configuration. You should create specific roles that limit exec permissions by implementing fine-grained access control.
- Audit Logging. Enabling Kubernetes audit logging to track exec sessions by configuring your cluster to log all exec requests
- Container security. Create containers having security in mind (use read-only root filesystems when possible, run containers as non-root users, implement Pod Security Standards or Pod Security Policies)
Troubleshooting common issues
Some of the common issues that can arise while using the kubectl exec command are the following:
- When seeing ‘Unable to use a TTY - input is not a terminal’, remove the - t flag and use only -i (
kubectl exec -i my-pod - - /bin/sh) - Another error that can arise is ‘OCI runtime failed: exec failed… starting container process caused:exec: '/bin/bash': stat /bin/bash: no such file or directory’, which means that bash was not installed in the container. Many minimal container images, such as Alpine-based ones, only include /bin/sh, so you should always try using it first to ensure compatibility. You could also install bash temporarily, as any packages installed on a running pod will be lost when the pod is restarted. Here’s an example of how you can install bash in Alpine:
kubectl exec -it my-pod -- apk add bash
Then you can run it like so:
kubectl exec -it my-pod -- /bin/sh
If you are experiencing connection timeouts, please check your pod status, pod logs, network policies that may be blocking API server communication, and DNS resolution issues in your cluster.
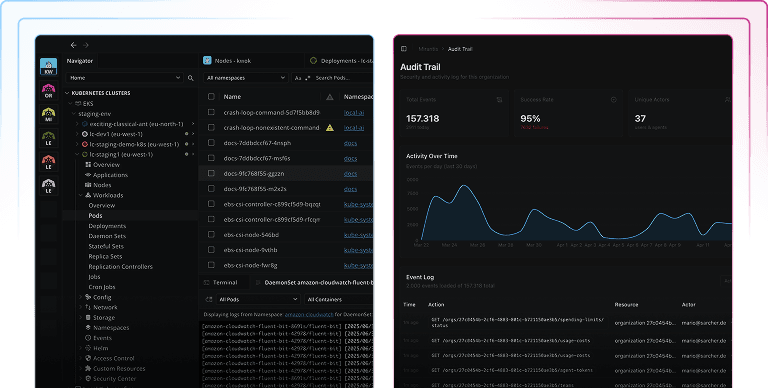
How Lens Kubernetes IDE can help you connect to your pods
While kubectl exec is powerful, remembering the names of your pods, your container names, and the namespaces they reside in can be cumbersome, especially when you are working with multiple clusters. Lens Kubernetes IDE simplifies this process by offering a visual interface for all your K8s clusters that is also context-aware.
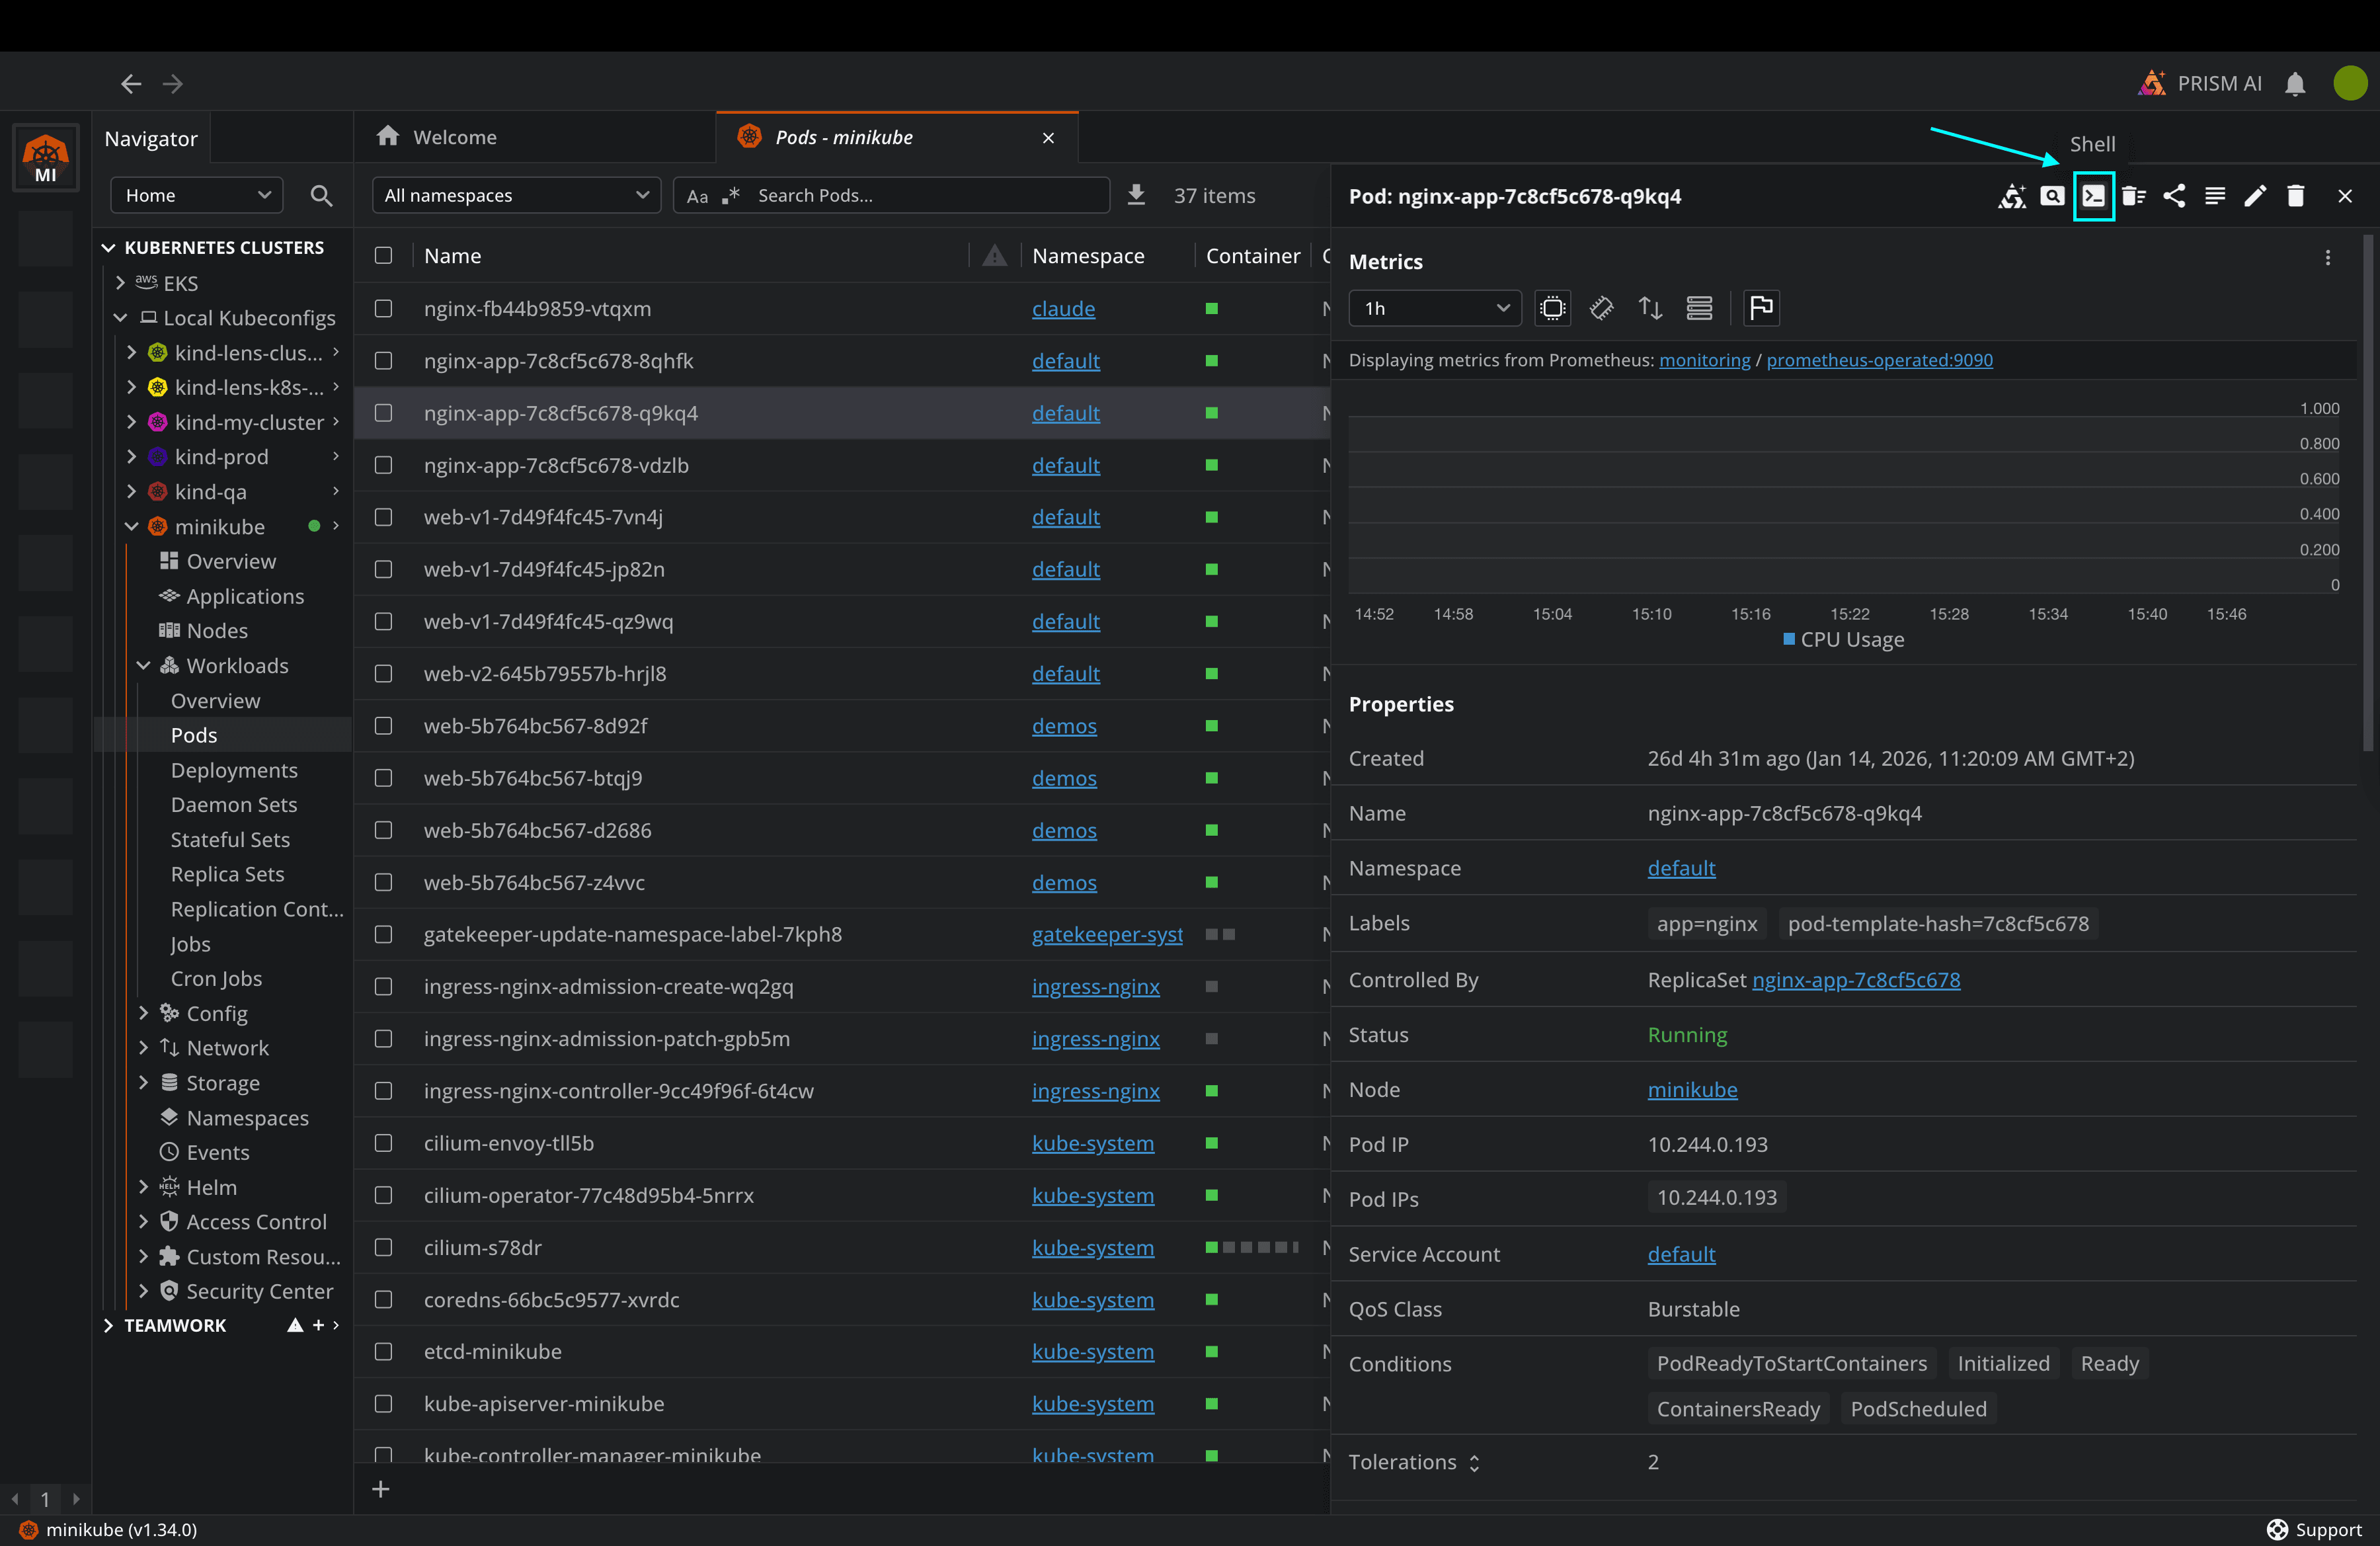
Instead of running kubectl get pods to view which pods you have and then using filters for your namespaces, with Lens K8s IDE, you can view all your pods in a single place, browse by namespace, or even search for pods by part of their name. You can click any pod to view its details, and you will see all the containers available there.
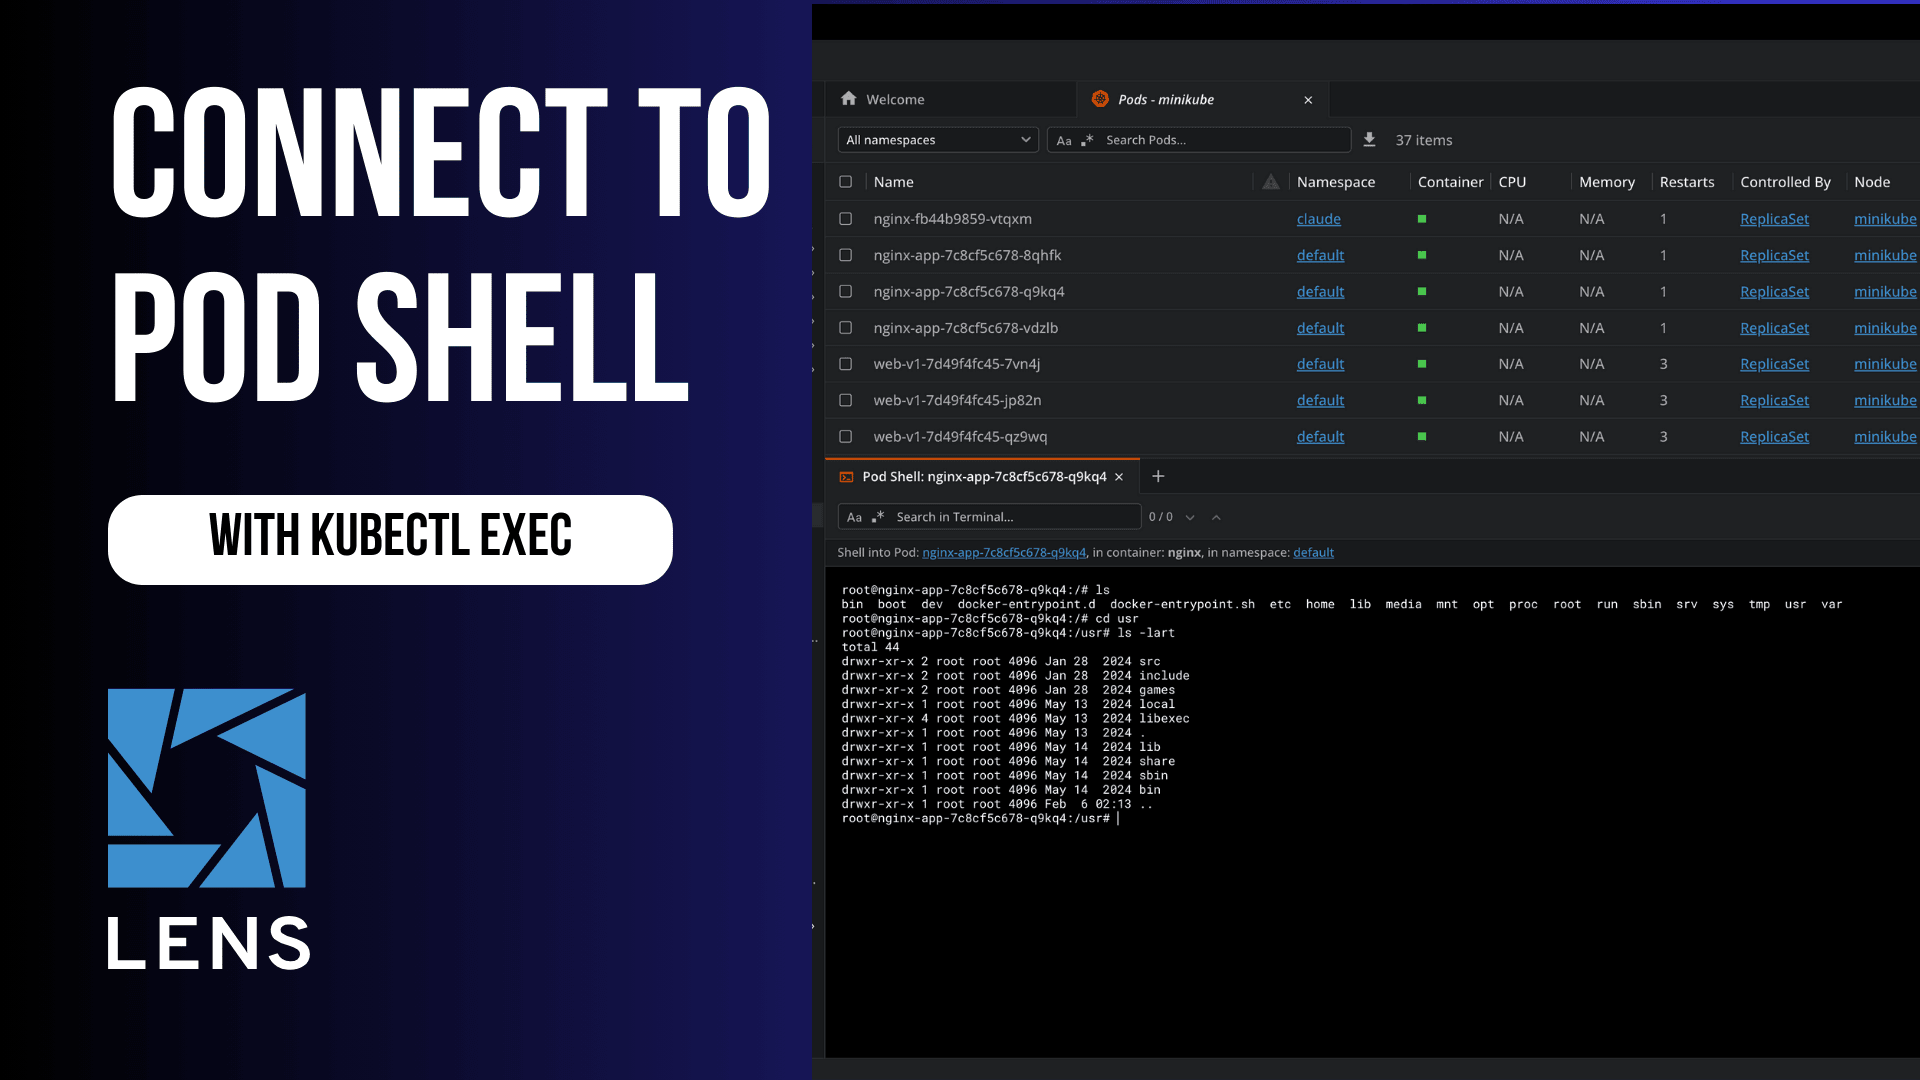
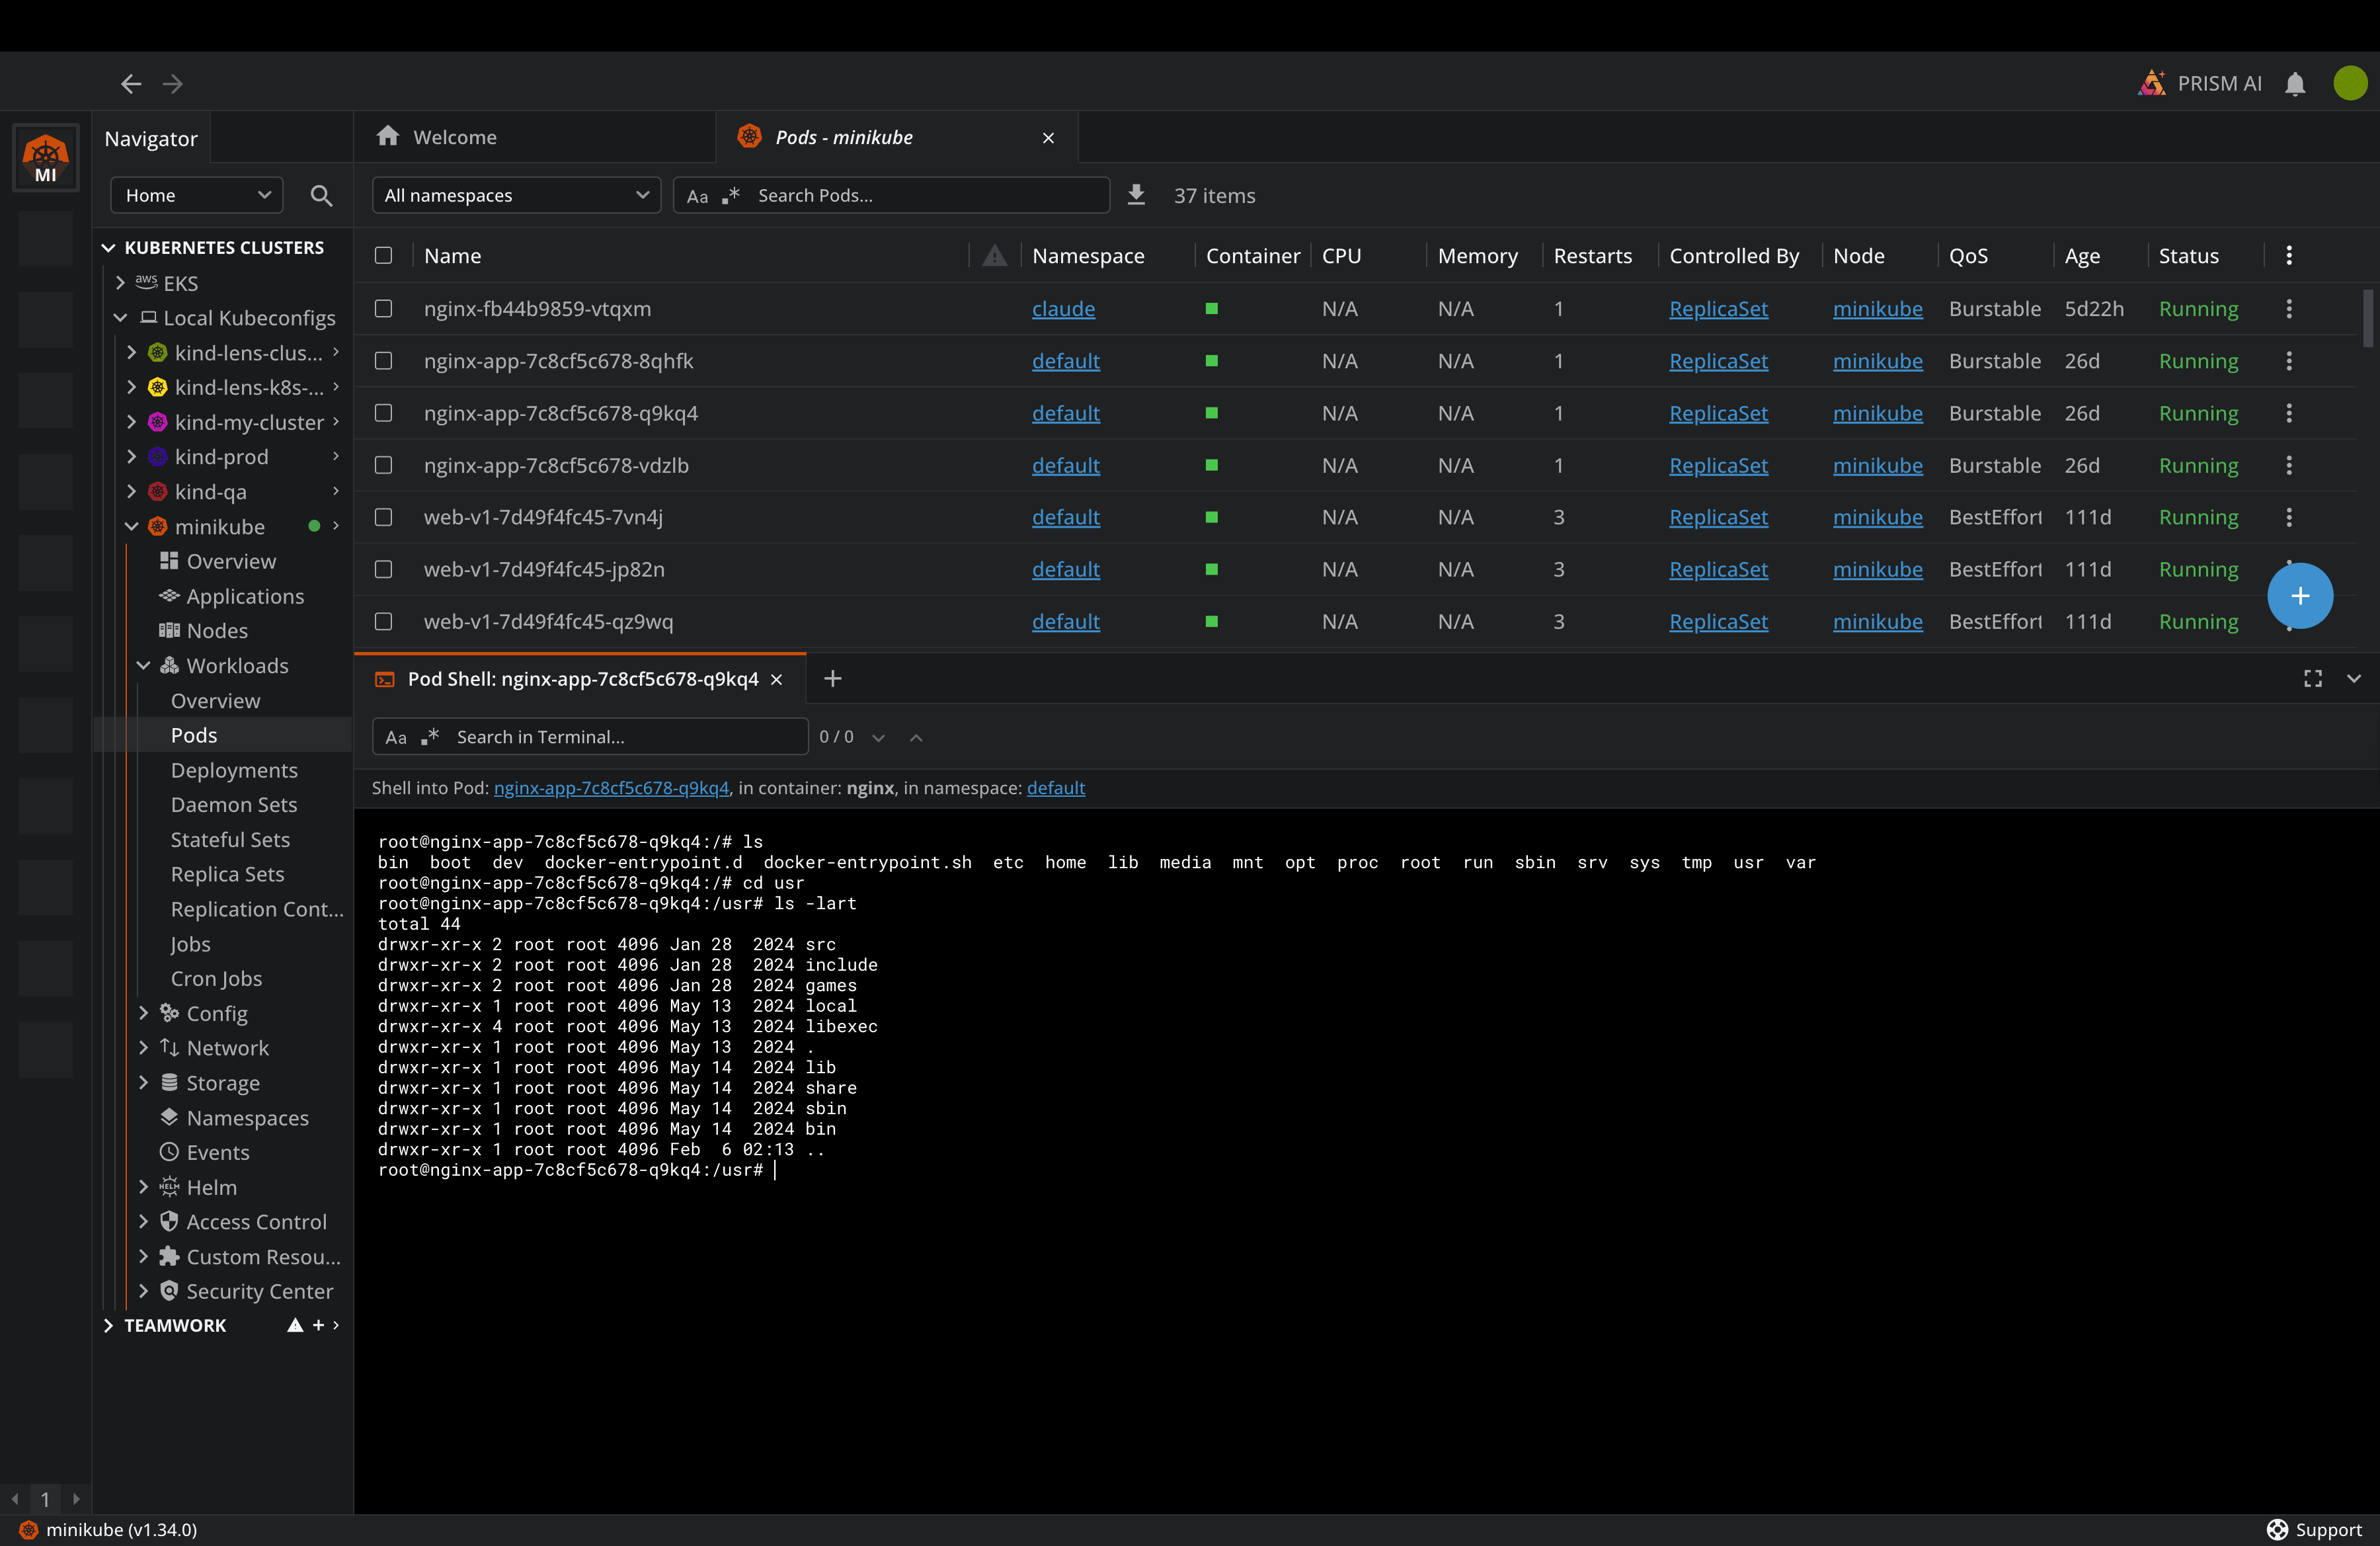
Lens K8s IDE also offers you an out-of-the-box way to connect to your containers, by simply pressing a button, like shown in the example below:
This connects to your pod shell, and from here you can run any commands you want:
Check out this video to see how easy it is to connect to your Pods:
With Lens K8s IDE, you can easily connect to your EKS and AKS clusters with our one-click integrations, use Lens Prism for AI troubleshooting, manage Helm charts and CRDs, and leverage our Security Center to understand what vulnerabilities your clusters might have.
Conclusion
The kubectl exec command is a vital tool for all Kubernetes operators, enabling them to directly access running containers for debugging, troubleshooting, and administrative tasks.
Understanding its syntax, options, and security implications, you can easily maintain your cluster security and operational quality.
Book a demo with the Lens team to understand how we can make your Kubernetes operations easier.